How to Configure SCIM Provisioning using Azure AD
System for Cross-Domain Identity Management (SCIM) is an open standard protocol used to automate the exchange of user and group information between Identity providers and Enterprises. SCIM ensures that users added to the Identity Management System should have their accounts automatically created in VIDIZMO. User attributes and profiles are synchronized between the two systems, updating and removing users based on the user status or CAL change.
VIDIZMO offers a SCIM 2.0 REST API so that the pain of working with proprietary user management APIs or products can be reduced or eliminated. The knowledge of how to set up and test your application and API endpoints in order to be able to successfully deploy an Azure Active Directory integration using SCIM Provisioning is of utmost importance whether you are an independent software vendor (ISV), an existing Azure Active Directory user, or an IT systems administrator.
Prerequisites
- Ensure that you belong to a group where the Management of SSO + SCIM permission is enabled to access this feature.
- Before provisioning users and groups from Azure AD through SCIM protocol, make sure you have an Azure Active Directory account so that you can configure the General Settings and any Sign-On Options for the custom VIDIZMO Web Application in Azure AD.
- Make sure you have Global Administrative rights for the Active Directory and access rights to set up Enterprise applications.
Configuration Steps
VIDIZMO Configuration
Following are the steps to configure SCIM Azure AD Provisioning in VIDIZMO:
-
Log in to VIDIZMO portal and from the Portal's Homepage:
- Select the Navigation menu on the left corner of the page.
- In the Admin tab, open the Portal Settings page.
-
From the Portal Settings page:
- Select Apps option to expand it.
- Navigate to the Provisioning tab, and select it to open.
- Navigate to the Configuration icon of SCIM Azure AD, and select it to open.
-
In order to enable the SCIM app first you need to perform the following actions:
- Select a default CAL.
NOTE: The default CAL is the CAL that will be assigned to the users by default during the time of provisioning from Azure AD.
-
Select Generate API Token to generate an API key against your domain for authorization purposes.
-
Provide the expiry date and select Add to generate an API Key.
NOTE: The provisioning and de-provisioning management will be revoked from Azure AD once the expiry date limit exceeds.
- Copy the generated API token to the clipboard and save the changes from the Save Changes button.
NOTE: This API Key will be used during the configuration of API Integration in Azure portal.
-
This BASE URI will be used while configuring the connection to custom VIDIZMO app API and synchronize user data in Azure portal.
-
If you want to configure the option of setting rules for automatic CAL assignment specifically for users belonging to specialized groups, refer to How to Configure Rules for Automatic CAL Assignment using SCIM.
-
Enable the app by selecting the toggle button.
NOTE: A notification will appear stating "Portal Information Updated Successfully".
Azure AD Configuration
Following steps will be taken in the Azure portal for building a connection with VIDIZMO portal in order to implement user provisioning in VIDIZMO.
NOTE: To proceed with Provisioning that supports SCIM you must first add a custom VIDIZMO Application in your Azure Portal.
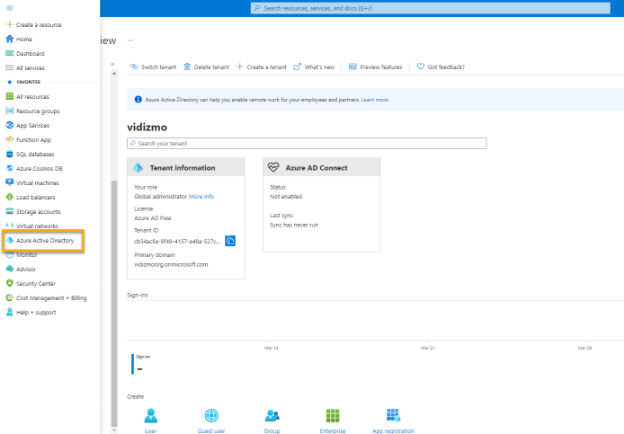
- Navigate to the Azure Active Directory in the left pane from the navigation menu in the top bar.
NOTE: Make sure you are in the right tenant. Learn more about creating and accessing tenant at Quickstart - Access & create new tenant - Azure AD | Microsoft Docs
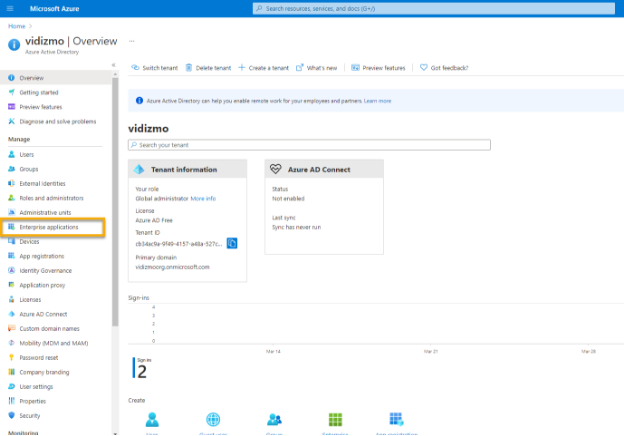
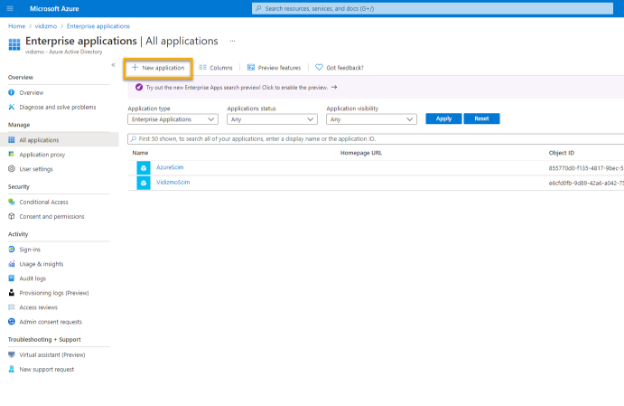
- From the left pane, go to Enterprise applications > All applications in the Azure Active Directory.
-
Select the Add New application option and follow these steps:
- Select Create your own application on the enterprise applications screen and navigate to the pane that will appear on the right side of the screen.
- Enter the name you wish to give to your custom app.
- Select the Non gallery app option from the given options.
- Select Create in order for the app to be created in the enterprise applications.
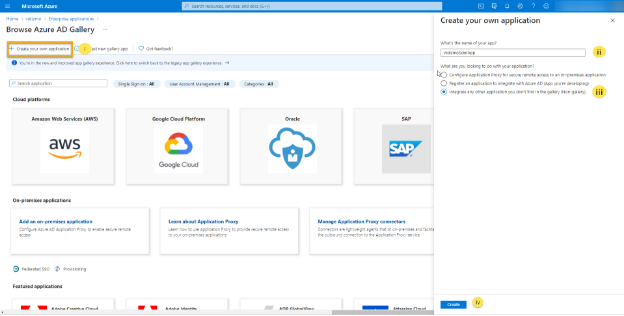
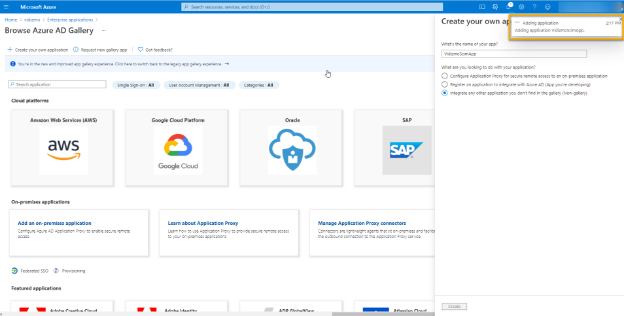
A toast notification will appear stating "Adding application (Custom Input Name)".
-
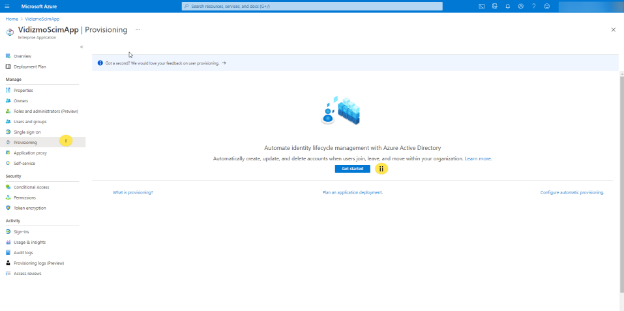
After the application has been created perform the following actions in the custom app screen:
- Navigate to the Provisioning tab from the left pane.
- Select Get started.
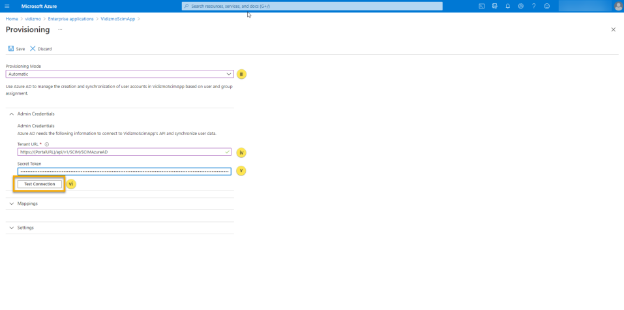
- Select Automatic for the Provisioning Mode. Learn more about provisioning modes here.
- For Tenant URL, enter the BASE URI explained above.
- For Secret Token, enter the generated token that you copied to the clipboard above.
- Select Test Connection to ensure that the connection can be successfully established between Azure AD and VIDIZMO.
NOTE: If you receive no confirmation notification, double check the Tenant URL and make sure it is not blocked by firewalls and other network interceptors inside your network, as well as make sure the API Token is correct.
- In the Notification Email field, enter the email address of the person or group who should receive the provisioning error notifications and check the checkbox "Send an email notification when a failure occurs".
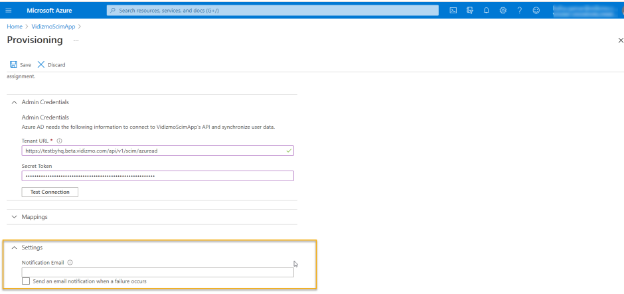
- Select Save. Once the provisioning settings have been saved, you will get the following notification "Successfully updated Application name."
Provisioning
User(s) and Group(s)
Following are the steps to manage provisioning of users and groups in Azure Active Directory to VIDIZMO portal.
Add
In order to add users/groups in the VIDIZMO portal following steps needs to be followed:
-
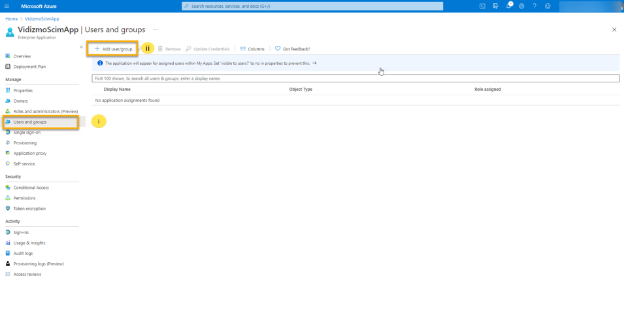
In the custom VIDIZMO App in Azure AD:
- Select the Users and groups tab.
- Navigate to Add users/groups to select users from the Active directory.
-
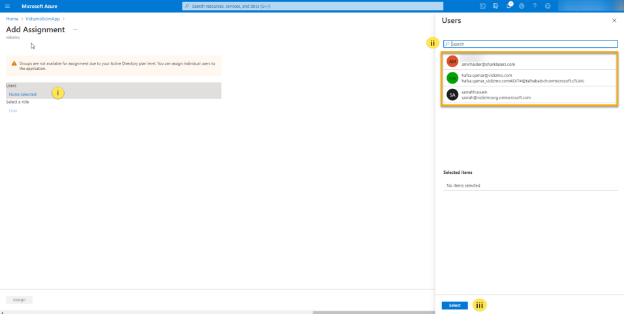
From the Add Assignment screen:
- Select Users.
- Select the user/group from the drop down list and selected user would start appearing in the Selected Items list.
- Select Select after you are done selecting the users that you want to assign to the VIDIZMO custom application.
- After selecting the users/groups from the list the Assign button will get activated and selecting it will assign all the users and groups to the application.
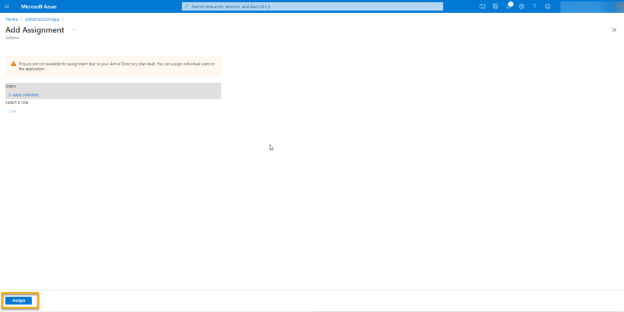
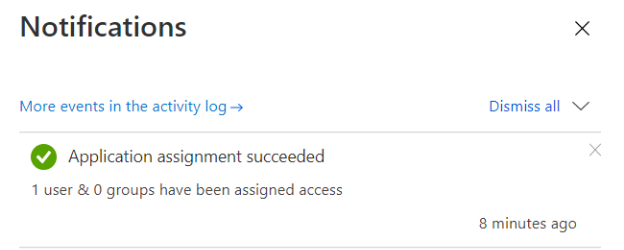
- You will receive a notification once the assignment has been successfully completed.
- Now, navigate to the Provisioning tab in the custom VIDIZMO App and select Refresh.
NOTE: In Azure the performance of provisioning depends upon whether your provisioning job is running an initial cycle or incremental cycle. However, the regular scheduled time interval of automatic provisioning is typically every 40 minutes. Find out how long it takes to provision users here.

De-Provisioning
In order to deprovision users and groups, un-assign the users/groups from the custom VIDIZMO App as shown below:
-
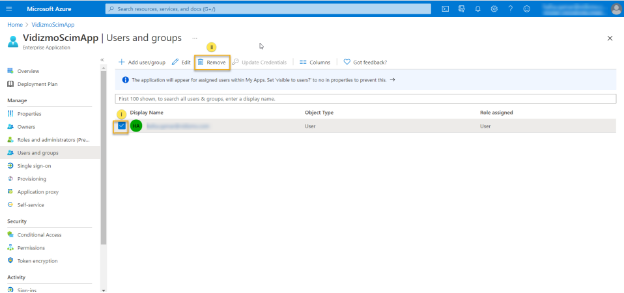
From the Users and groups tab in the custom VIDIZMO App in Azure Portal:
- Select the users and groups that you wish to remove.
- Select Remove to un-assign the selected user from the application.
NOTE: In VIDIZMO, removing the user from Azure AD will set the "IsActive" property of user to false in VIDIZMO database. Also, to learn more about how De-provisioning works in Azure AD read here.
Limitations
- Users cannot be permanently deleted from VIDIZMO, they will be deactivated instead. A deactivated user can be reactivated. When a user is deactivated via SCIM, VIDIZMO immediately disables their membership to their account, ensuring that their access is immediately revoked. The user is treated as an anonymous user in the VIDIZMO portal.
- Provisioned users cannot change their user profile information because they are treated as a Federated User in the VIDIZMO portal.
- Provisioning and deprovisioning can be enabled only on portals that are created under the subdomain policy. Learn more about domain options in VIDIZMO from Understanding Domain Options for a Portal.
Read Next
- How to Configure SCIM Provisioning using Okta
- How to Configure Rules for Automatic CAL Assignment using SCIM